
To validate one or more graphics for a project:
Step 1 – Select Graphic Type
Step 2 – Add Graphics to Documents List

A dialog will popup to allow you to select graphics.
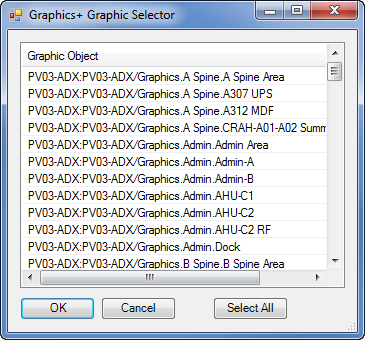
Note: Standard and Graphics+ graphics select graphics directly from the SCT archive database that is linked to your project. You must make sure your latest graphics have been uploaded to the SCT prior to running the validator. For Advanced graphics, the selector will allow you to pick the source Visio graphic files.
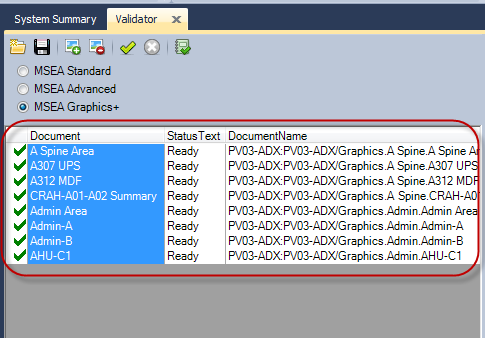
You will see the selected graphics now in the document list.
Important! You should always validate template graphics separate from the rest of your graphics. Templates also need to be validated prior to any validation of aliased graphics.
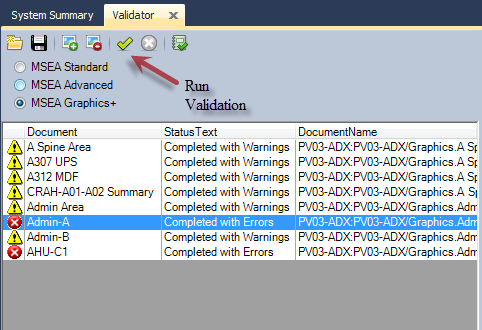
Step 3 – Run Validation
Click the “Run Validation” button and each graphic in the document list will be validated in sequence. Status icons will show basic results.
Clicking on each document will load the result details in the tabs on the right pane.
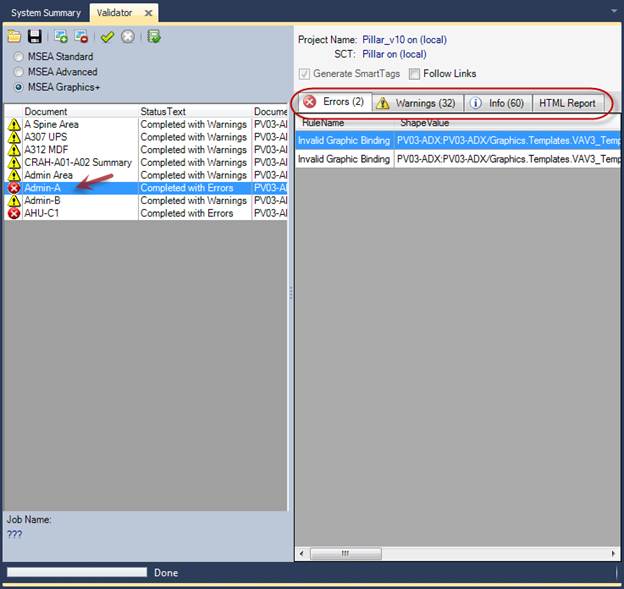
See next section “Validation Results” for explaination on each result tab.
Step 4 – Analyse Results
The errors found in the “Errors” tab are the most obvious result and ones that indicate a broken binding usually. The information found in the “Warnings” tab generally will include many “false positive” indicators so you have to sort through these results and determine whether there is anything of concern or not.
Step 5 – Check the system points that were validated
Another import step is to find the actual system that was verified in the System Summary tab and verify that all of the point objects are shown as “Bound”. Any points that are not bound, you may want to investigate why the point was missed in the graphic.
In results above, AHU-C1 was found in the system summary:
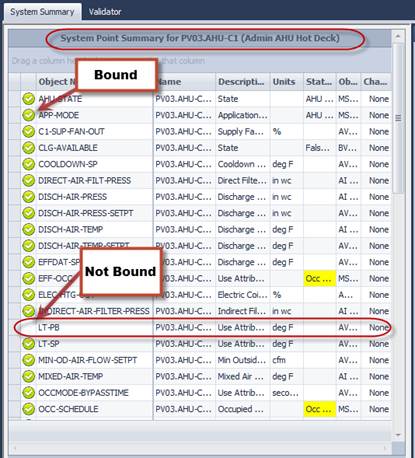
All of the points in this system, with the exception of LT-PB, was bound to at least one graphic after validation was run. In this case, this point was deliberately left out of the graphic.
Step 6 – Fix Graphics and Re-Run Validation
After checking results and making adjustments to graphics, re-run the validation and repeat the steps above until you have the desired results.